Elthough still in its infancy, the customization of die-cast models is a quickly growing hobby. For the majority of those involved, this extension of model building and die-cast car collecting has evolved into a dance between the two activities. Instead of building a plastic kit straight stock or kit bashing, collectors personalize their collectible die-cast cars with custom paint jobs, wheel/tire swaps, or a totally integrated and completely new look.
Interest in die-cast customizing has exploded during the past few years; in fact, it has become so popular that there are now customs contests. These are usually held at Hot Wheels® conventions, national events and die-cast shows and model-car contests. Youll find information on custom-car contests on Internet bulletin boards and the Websites of special-interest groups.
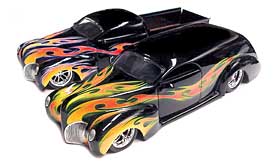
In the first few steps, Ill show you basic painting prep using a die-cast school bus as an example. Then Ill introduce one of the methods I use for custom paint jobs. Ill show you how two, 1:18-scale Hot Wheels Lincoln Zephyr coupes are converted into a radical pickup and a sedan delivery. Although there are many ways to do this, the following process has consistently yielded outstanding results for me, and I have been complimented by many die-cast collectors around the world. Now, lets get ready to shoot some flames!
|
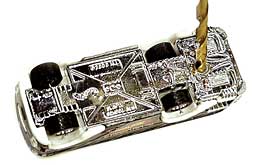
Most customizing is done on cars in the 1:64-scale group. Many of these are held together by factory-press body posts that look like rivets. To separate the chassis from the body, use an 11/64 drill bit (or one that’s the same size as the “rivet”). When you drill into these body posts, be sure to wear safety glasses and hold the car with a thick towel/cloth to avoid injury. |
|
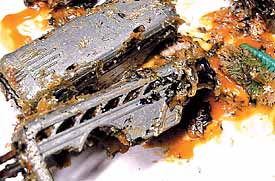
Although stripping off the factory paint isn’t always necessary, it’s a good idea to do so if you want more body details to be visible; an additional coat of paint can obscure such fine details as door lines and headlight outlines. Jasco and Klean Strip are excellent products that will quickly and easily remove the factory paint, and they can be purchased at hobby outlets and some auto stores (such as Pep Boys). Dip the car into a jar of stripper, or set it on cardboard or newspaper and apply the stripper with a cheap, thick brush. |
|
Most customizing is done on cars in the 1:64-scale group. Many of these are held together by factory-press body posts that look like rivets. To separate the chassis from the body, use an 11/64 drill bit (or one that’s the same size as the “rivet”). When you drill into these body posts, be sure to wear safety glasses and hold the car with a thick towel/cloth to avoid injury. |
|
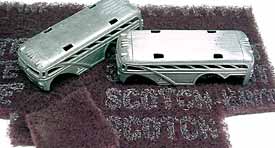
Clean the paint stripper off the body (following the manufacturer’s directions), and let it dry. When it has dried completely, scuff it with a Scotch-Brite pad or 400-grit sandpaper. This will increase the primer’s adhesion to the metal. These simple steps are essential for a good paint job, so don’t rush. You want a clean, smooth surface for the paint. In the photo above, the bus on the left has not yet been scuffed, and the bus on the right has a prepped body. |