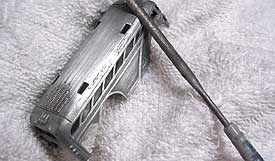
This is a great time to clean off excess body flashing that was left after the casting process. A rat-tail file is great for this job because it removes a little metal at a time; larger files can take off too much material with only one stroke. To protect your hands from sharp edges and points, it’s a good idea to hold the vehicle with a towel while you scuff and file the body. |
Use clean lacquer thinner to remove all traces of paint and solvent; rinse the body with water, or dip it right into the can of thinner. When the body has dried completely, it’s time to apply the primer. Spray on a mist coat, and then wait a few minutes for it to dry a little before you apply a full-coverage coat. Primer not only serves as an adhesive for the paint, but it also makes it easier to see imperfections in the body. This is the time to do additional filing and to fill in those areas. Next, reinstall the body on the chassis using two-part epoxy or J-B Weld. Although J-B Weld is gray, you can cover it with paint to match the chassis. Use modelers’ rivets and screws on the underside to give the chassis a factory look. When you start customizing, I suggest that that you use the paint from regular hobby-store spray cans. You may want to wait for a while before you invest in an airbrush and move on to automotive paints and clearcoats. When you are ready to make the move, visit coastairbrush.com; it sells small quantities of automotive paints in 2-ounce plastic squeeze bottles (for use with an airbrush) along with everything else you’ll need for a high-quality paint job. |

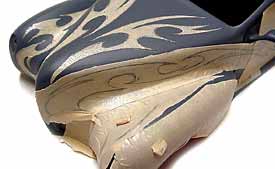
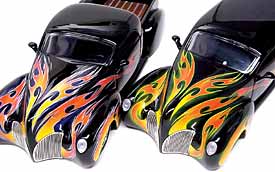
Now that we’ve covered the basic essential prep work, here are step-by-step instructions for applying two wild, custom, tribal flame designs. If you look closely, you can tell that the two flame designs came from the same mask. The differences between them are their different pinstripe colors and styles. The two 1:18-scale customs shown here started as Lincoln Zephyr Coupes and have now been customized into a pickup truck and a delivery truck. Jerry Chewing of JerZ Garage in La Habra, CA, did the superb bodywork. |
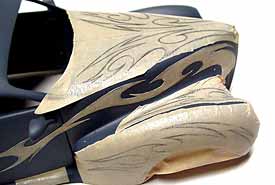
Here’s the primer-painted body with 3M’s regular 2-inch-wide masking tape in place and marked with the beginning of the flame-design layout. Experienced customizers use such tape because it’s high-tack and durable, and it’s easy to draw designs on it with a no. 2 pencil. The Zephyr has a lot of front-end curves, and the 3M tape adheres well. When working on flat surfaces, I prefer to use transfer tape/pre-mask, which is less tacky and also easy to draw on. |
Lightly cut the edges of the design with a hobby knife. Instead of using a no. 11 blade, use a no. 14; it’s more forgiving because its point is less sharp. Control the pressure on the blade so that you don’t cut into the painted surface; the primer will come off with the tape if you cut too deeply. |